Working with Windows Live Movie Maker was quite fun. At first I was frustrated because I didn't understand what I was doing, but after I got going, it became clearer and with practice using this app will become second nature. Some of the features have been moved around because I have the latest version of Windows Live. For example, the audio mixer was moved to the project tab...um that made no sense to me. Why not put it in the audio group? I also had issues with the splitting feature. This is where you can remove any portion of a video you no longer want. I didn't quite understand fully how this works, but with practice I will master this. Playing around with the features like adding titles, changing background color, adding animations etc., got my creative imagination running wild. I loved all of the saving and publishing options including saving in HD format. One of the coolest features is the AutoMovie where you can apply a theme and Windows Live Movie Maker will make the movie instantly.
I've never done anything like this before other than using my digital
camera and now my Razr Maxx smart phone to create videos. Now that I've
gotten my feet wet messing around with this application, I want to do
something fun with the video of my oldest granddaughter's ballet recital
and incorporate still shots of her little sister's performance (I did
not get a video of her performance sad to say). Then, I shall surprise
the girls and their parents with grandma's brilliant creation, ha! One
of the things the chapter discusses is how to publish a movie (or any
video) to YouTube. This is something I have done with the dance recital I
mentioned above. It is a terrific way to share a video with family
members who would be interested in seeing it.
This is my final post for this class. It's been a fun learning experience working my way through the chapters and various capabilities of Windows 7. The final activity is a question and answer session about Movie Maker, such as what are the basic steps to create a movie, what is a transition, an effect. This last chapter is my favorite because it's new and I love learning new things.
Saturday, July 28, 2012
Chapter 8 Mastering Digital Pics & Music
I've been working with digital pictures and music files for a long time. I already knew how to import pictures from my digital camera to the computer, edit, enhance, save, print or order prints online. I did this without using the applications that comes with Windows, preferring to use third party software. It was a nice change of pace to learn how to use the Windows applications to work with my digital files, I loved some of the features and the ease of use.
For example, I like how easy it is to rename a group of files, and tagging them to make files easier to find. The text book emphasizes the importance of making a backup copy of pictures you edit in case you make a mistake and can't go back to the original. I always do this anyway, but it's nice to be reminded and also learn another way to create backups without the old right click, copy, name the file, save. I loved the option to view pictures and videos with the aid of a table of contents.This allows you to see your picture and video files by location on the computer along with details of each file.
One of the differences from the text book and the latest version of Windows Live was encountered during the editing pictures segment. To correct red-eye in a picture, the text book says to click the 'Fix' button. Instead of a 'Fix' button I would select an option on the 'Adjustments' ribbon such as 'red eye'. The red eye feature is pretty straight forward. To correct red eye in your photo you trace a rectangle around the eye using the mouse pointer. The application automatically adjusts without any other interaction on my part. One thing that I noticed was a 'Fine tune' button. I clicked on this and a navigation panel opened on the right side of the screen with options to adjust exposure, color, straighten photo, adjust detail. I really liked that! This application won't replace my Microsoft Digital Image Pro for editing photos but I will use it for quick and easy touch-ups such as the red eye feature. One other feature I found very useful is when you do make changes to a file such as applying a black and white filter, you can easily revert back to the original picture later after making changes. You can also order prints online through the gallery using order prints online dialog box. I almost always use Walgreens which isn't one of the options. I go to the Walgreens website to upload photos to order prints. It's convenient for me because I live very close to a Walgreens.
Windows DVD Maker allows you to make a DVD of your files. I've not made DVD's this way but it's pretty straight forward and easy, so I can see myself using this application in the future.You can use Windows Media Player (WMP) to sync your Mp3 player with your music files, rip music from CDs to your library, play your music, and burn CDs. I did like using the Player to rip music and create a music CD. There was more flexibility (or so it seem) than when using iTunes to do this. Creating a playlist was easy enough, comparable to using iTunes.
The activity for this chapter involved using Help and Support to learn more about using WMP, answering questions on the various functionality of the Player. I learned that one of the conditions that needs to be met for WMP to default to automatic sync is the device storage capacity must be 4GB or more. Another condition is your entire Player library must also fit on the device. I have a 160GB iPod and my music library is under 12GB at this time. However my other device is only 1GB, so I would need to manually sync the files in this case.
Monday, July 16, 2012
Chapter 7 Advanced File Searching
This week's chapter is dedicated to learning to use the various search functions and techniques available in Windows 7. Most of my searches are very basic with an occasional wildcard search where an asterisk is used to indicate an unknown part of the file name. At my job, I use the Boolean method frequently using the company's mainframe interface but have not ever tried this on a windows interface. I can understand how useful this particular search function can be for Windows 7 users. It is more advanced, and requires knowledge of how operators work. Creating a cheat sheet will help speed up the learning curve for all of the searches available.
An example of a boolean search is using the word AND (must be in capital letters for this to work). The text book example is to type koala AND jpg into the search bar, press enter. The file found is a picture file named Koala.
An example of exact phrase search given by the text book: type into the search bar "Microsoft Windows", press enter. The quote marks around the words indicates that this is the exact phrase to be searched.
One of the search functions that I found most useful is complex combining a file property and a range. Your friends will be impressed by your skills if you learn to master this function, lol. The example the text book gives is to search for files between the size of at least 10MB and less than 30 MB. Type into the search box: size: > 10MB AND < 30MB, press enter. The laundry list of files within that range displays.
In the screen that displays search results, scroll down to find a list of options to search again to narrow the scope of your search. These options are Libraries, Homegroup, Computer, Custom, Internet, File Contents. The Custom button allows you to change the search by using the 'choose search location' dialog box to create a custom scope. This allows you to narrow the current search to another location.
If you want to use natural language to search rather than try to remember the fancy schmancy advanced Boolean operators and property names of other searches, Windows 7 has a way to do this too. For example, click the Organize button in the Windows folder, select Folder and search option, click search tab, select Use natural language search, click ok. The text book says to type flower pictures in the search box. A list of files displays with the word flower as part of the file name. Reverse the steps taken to turn on the natural language feature so that you now turn it off. Repeat the search, and the results will be nothing.
Other searches includes filter files using file list headings (pretty handy); using the file's properties to refine searches such as tag:, date:, authors:, genre: title: and size:. Again, creating a cheat sheet will help speed up the learning process on what filters and properties are available.
I learned how indexing plays a part in the speed of finding files on the computer. Indexing helps keep track of files and folders stored in indexed locations. By default Windows 7 indexes each user's personal folders, which contains the Documents, Pictures, Music, and Video libraries. You can add any folder to the indexing properties at any time, but our text warns that the index will not perform well if it grows too large. It is recommended that locations should only be added that contain personal files. Never add program or system files.
According to my text book, Windows 7 is supposed to have two default searches, one called Everywhere search and the other called Indexed Locations search. Neither one exist on my computer. I don't remember deleting those files, but they're not there. Kinda strange. You can also save your custom searches. Be warned however, deleting search results deletes the files from your computer! Be careful out there!!
Chapter 6 Customing Your Computer Using Control Panel
Chapter 6 covers using the control panel to customize your computer. There are eight main categories with links within each of the main categories. It is in the control panel where you will find the settings for the system and security of your computer, add devices, install/uninstall programs, set up or modify user accounts, change the clock/language/region, add an ease of use feature, and much more.
The System and Security category is where you can view settings for the Firewall, change system settings, configure Windows Update, change the power settings, schedule backups and much more. By default Windows 7 turns on the firewall to protect your computer from unauthorized users between your computer and the internet. If you happen to use a different firewall or security suite like I do (Norton's Security Suite) you will find Windows 7's firewall turned off and a message that says 'These settings are being managed by vendor application Norton 360' (see screen shot below). The Action Center is where you can review your computer's status and resolve issues, change user account control settings, troubleshoot common issues, and restore to an earlier time. Click on the System's link to see what your Windows Experience Index rating is. Mine isn't very good, 3.6, the lowest score is gaming graphics 3.6, all of the other scores are 7.2 for processor, 7.2 for memory, 4.7 for graphics, and 5.9 for primary hard disk data transfer rate.
Usually when I plug in a new printer, Windows configures it automatically, but you can add printers manually through the Hardware and Sound category. To do this you must know which port the printer is connected and find the printer in the list of devices so that the correct printer driver is installed.
I learned how to customize the mouse by clicking on the link under Devices and Printers that says 'Mouse'. You can configure the mouse buttons to behave differently, adjust the double-click speed, turn on Clicklock and/or Snap To, adjust pointer speed, and add a tail to the pointer. The Clicklock and Snap To features are useful. What the Clicklock does is allows you to click and drag select information without having to hold down the mouse button. The Snap To feature allows for the pointer to snap to the default button in any dialog box. Of the two, I would likely use Clicklock more.
Also in the Hardware and Sound category is a link to customize the AutoPlay features. This is something new to me. You can modify the settings for all media and devices, how they behave when inserted into the computer such as an audio CD, DVD movie, software and games, video files, pictures, audio files.
If you want to uninstall an application, you can do this using the Programs category. Click on the 'uninstall a program' link under Programs and Features. Here you can also view installed Windows updates, turn Windows features on or off, view the personalize gallery, configure older applications to run in Windows 7, add/customize desktop gadgets, and view how to install a program.
The User Accounts and Family Safety category has a link called Windows CardSpace. This is something I am totally unfamiliar with. Apparently this is to manage information cards that are used to log on to online services. Microsoft says Windows CardSpace can replace the user names and passwords that you use to register with and log on to websites and online services. Wikipedia claims that on February 15th 2011, Microsoft announced that Windows CardSpace 2.0 will not be shipped. Microsoft is currently working on a replacement called U-Prove. I guess I won't be investigating any more about this. I probably wouldn't use this feature anyway. The other features of this category includes creating and managing user accounts, setting up parental controls for accounts, and set up mail profiles.
The other categories in the Control Panel are Network and Internet, Appearance and Personalization, Clock/Language/Region, and Ease of Access. The Clock/Language/Region allows you to adjust the date and time, with region and language options. Ease of Access makes the computer easier to use people who have mobility, hearing or vision impaired. People like myself who are hard of hearing may find some of the features useful. There's an option called Sound Sentry that turns on captions when a program speaks or makes sounds if captions are available. I'll have to give this a try to see if it will work for me.
I haven't had a chance to complete the activities for this chapter but when I do I will update this post with my comments.
The System and Security category is where you can view settings for the Firewall, change system settings, configure Windows Update, change the power settings, schedule backups and much more. By default Windows 7 turns on the firewall to protect your computer from unauthorized users between your computer and the internet. If you happen to use a different firewall or security suite like I do (Norton's Security Suite) you will find Windows 7's firewall turned off and a message that says 'These settings are being managed by vendor application Norton 360' (see screen shot below). The Action Center is where you can review your computer's status and resolve issues, change user account control settings, troubleshoot common issues, and restore to an earlier time. Click on the System's link to see what your Windows Experience Index rating is. Mine isn't very good, 3.6, the lowest score is gaming graphics 3.6, all of the other scores are 7.2 for processor, 7.2 for memory, 4.7 for graphics, and 5.9 for primary hard disk data transfer rate.
 |
| Firewall managed by Norton's 360 |
I learned how to customize the mouse by clicking on the link under Devices and Printers that says 'Mouse'. You can configure the mouse buttons to behave differently, adjust the double-click speed, turn on Clicklock and/or Snap To, adjust pointer speed, and add a tail to the pointer. The Clicklock and Snap To features are useful. What the Clicklock does is allows you to click and drag select information without having to hold down the mouse button. The Snap To feature allows for the pointer to snap to the default button in any dialog box. Of the two, I would likely use Clicklock more.
Also in the Hardware and Sound category is a link to customize the AutoPlay features. This is something new to me. You can modify the settings for all media and devices, how they behave when inserted into the computer such as an audio CD, DVD movie, software and games, video files, pictures, audio files.
If you want to uninstall an application, you can do this using the Programs category. Click on the 'uninstall a program' link under Programs and Features. Here you can also view installed Windows updates, turn Windows features on or off, view the personalize gallery, configure older applications to run in Windows 7, add/customize desktop gadgets, and view how to install a program.
The User Accounts and Family Safety category has a link called Windows CardSpace. This is something I am totally unfamiliar with. Apparently this is to manage information cards that are used to log on to online services. Microsoft says Windows CardSpace can replace the user names and passwords that you use to register with and log on to websites and online services. Wikipedia claims that on February 15th 2011, Microsoft announced that Windows CardSpace 2.0 will not be shipped. Microsoft is currently working on a replacement called U-Prove. I guess I won't be investigating any more about this. I probably wouldn't use this feature anyway. The other features of this category includes creating and managing user accounts, setting up parental controls for accounts, and set up mail profiles.
The other categories in the Control Panel are Network and Internet, Appearance and Personalization, Clock/Language/Region, and Ease of Access. The Clock/Language/Region allows you to adjust the date and time, with region and language options. Ease of Access makes the computer easier to use people who have mobility, hearing or vision impaired. People like myself who are hard of hearing may find some of the features useful. There's an option called Sound Sentry that turns on captions when a program speaks or makes sounds if captions are available. I'll have to give this a try to see if it will work for me.
I haven't had a chance to complete the activities for this chapter but when I do I will update this post with my comments.
Sunday, July 8, 2012
Chapter 5 Personalizing Your Work Environment
I must say that working through chapter 5 was a happier experience than last week's chapter!
There are many ways to customize Windows 7 to suit your personal tastes. Chapter 5 covers personalization of the desktop (and using a desktop theme), sound, screen saver, mouse pointers, desktop icons, taskbar, display, notification area, start menu, and folder options. It is fun experimenting with the various options and settings. If you mess up something or you do not like what you've created, you can always click the RESTORE DEFAULTS button.
The options for customizing your desktop is virtually limitless. If you don't like any of the themes included with windows, you can create a new one using your own pictures to give your working environment a distinctive look. In the panel where the themes are located, there's a link to 'get more themes online'. You can customize the window color. This means the color of your task bar and the borders around a window. The options include setting the color intensity, and a color mixer panel which I had some fun with. I got the perfect shade of purple playing around with these settings. I prefer to use a single picture instead of a slide show for my desktop background. I also use window's default settings for window color, sounds, and mouse pointers. I don't use screen savers. Years ago I did when it was more important to have one to avoid the background picture from burning into the monitor screen. Instead of a screen saver, I use power management to shut the monitor off and put the computer to sleep after two hours.
Also if you're using a slide show for your desktop theme, you wouldn't need a screen saver so it would be redundant to use one....but that's just my opinion!
You may have noticed that by default Windows 7 displays just one icon on the desktop, the Recycle Bin. You can add other icons if you wish through the Desktop Icon Settings dialog box. The icons to choose from are Computer, User's Files, Network, Control Panel and of course the Recycle Bin. I prefer a clean desktop with as few icons as possible. Presently I have one folder on the desktop in addition to the Recycle Bin. It is entitled 'Stuff', lol. A bunch of 'stuff' is in this folder, some miscellaneous pictures, shortcuts, 'stuff' from my previous CIS classes...just stuff and more stuff. Hee hee.
One of the more useful functions of Windows 7 is adding a toolbar to the taskbar. Adding the address toolbar allows you to search for a web page, start a program, open a document, and open a folder! Pretty spiffy. Another customization feature is to pin an item to the taskbar. I have a few items pinned to mine beyond the default pinned items. Google Chrome, Firefox, iTunes, Windows Live Mail, and Mahjong Titans. You can move the taskbar to another area on the desktop...to the either side vertically or move it to the top. I've always preferred mine pinned to the bottom ... it drives me nuts to have it anywhere else!
In the notification area you can change the behavior of the notification icons. I suppose if you were tired of seeing the same notification pop up all the time, you'd want to turn it off. This can be done through the Customize Notification Icons window.
I like how you can modify the appearance of the Start menu by changing the number of recent programs to display or alter the look and behavior of menu items. I can see myself using this option either to add and to reduce. Sometimes I want more to show and sometimes I want less clutter in the start menu. The Customize Start Menu dialog box allows you to do more than adjust the recent programs to display. There are tweak options for Computer, Control Panel, Documents, Downloads, Games, and more.
Another way to customize your work environment is by changing the folder options. If you prefer to have each folder open up in its own window, this can be done through the Folder Options dialog box under the General tab. Personally I like the default setting where each folder is opened in the same window. You can chose to single-click to open an item or double-click (which is the default). Other tweaks can be made by clicking on the View tab. One of the options that I occasionally change is the Hidden files and folders. By default windows doesn't show hidden files, folders or drives. Sometimes I NEED to see these items and through the View tab I can select to Show hidden files, folders, and drives.
The activities for this chapter included taking snips of various screen shots and answering questions about Power Plans, Folder Options, and Address Toolbar display/content results. One of the snips taken shows that the Address toolbar has been added to my taskbar. The other snips are of screen shots that shows the results of various searches using the Address toolbar.
The key lesson learned from this chapter is that there is no wrong or right way to customize your desktop. It is very much the idea of whatever floats your boat is the right way.
There are many ways to customize Windows 7 to suit your personal tastes. Chapter 5 covers personalization of the desktop (and using a desktop theme), sound, screen saver, mouse pointers, desktop icons, taskbar, display, notification area, start menu, and folder options. It is fun experimenting with the various options and settings. If you mess up something or you do not like what you've created, you can always click the RESTORE DEFAULTS button.
The options for customizing your desktop is virtually limitless. If you don't like any of the themes included with windows, you can create a new one using your own pictures to give your working environment a distinctive look. In the panel where the themes are located, there's a link to 'get more themes online'. You can customize the window color. This means the color of your task bar and the borders around a window. The options include setting the color intensity, and a color mixer panel which I had some fun with. I got the perfect shade of purple playing around with these settings. I prefer to use a single picture instead of a slide show for my desktop background. I also use window's default settings for window color, sounds, and mouse pointers. I don't use screen savers. Years ago I did when it was more important to have one to avoid the background picture from burning into the monitor screen. Instead of a screen saver, I use power management to shut the monitor off and put the computer to sleep after two hours.
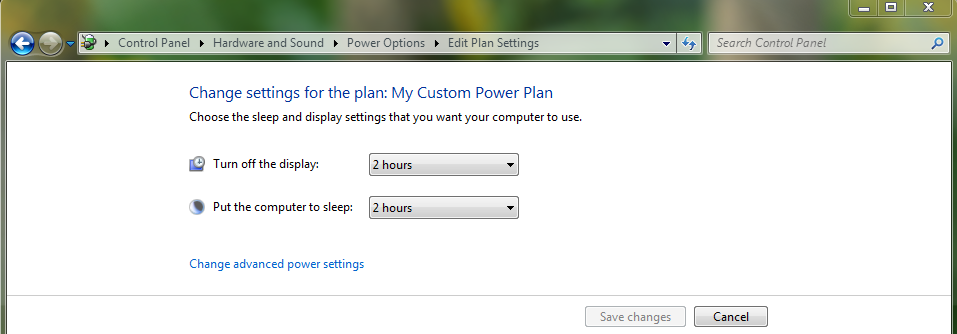 |
| My custom power plan |
Also if you're using a slide show for your desktop theme, you wouldn't need a screen saver so it would be redundant to use one....but that's just my opinion!
You may have noticed that by default Windows 7 displays just one icon on the desktop, the Recycle Bin. You can add other icons if you wish through the Desktop Icon Settings dialog box. The icons to choose from are Computer, User's Files, Network, Control Panel and of course the Recycle Bin. I prefer a clean desktop with as few icons as possible. Presently I have one folder on the desktop in addition to the Recycle Bin. It is entitled 'Stuff', lol. A bunch of 'stuff' is in this folder, some miscellaneous pictures, shortcuts, 'stuff' from my previous CIS classes...just stuff and more stuff. Hee hee.
One of the more useful functions of Windows 7 is adding a toolbar to the taskbar. Adding the address toolbar allows you to search for a web page, start a program, open a document, and open a folder! Pretty spiffy. Another customization feature is to pin an item to the taskbar. I have a few items pinned to mine beyond the default pinned items. Google Chrome, Firefox, iTunes, Windows Live Mail, and Mahjong Titans. You can move the taskbar to another area on the desktop...to the either side vertically or move it to the top. I've always preferred mine pinned to the bottom ... it drives me nuts to have it anywhere else!
In the notification area you can change the behavior of the notification icons. I suppose if you were tired of seeing the same notification pop up all the time, you'd want to turn it off. This can be done through the Customize Notification Icons window.
I like how you can modify the appearance of the Start menu by changing the number of recent programs to display or alter the look and behavior of menu items. I can see myself using this option either to add and to reduce. Sometimes I want more to show and sometimes I want less clutter in the start menu. The Customize Start Menu dialog box allows you to do more than adjust the recent programs to display. There are tweak options for Computer, Control Panel, Documents, Downloads, Games, and more.
Another way to customize your work environment is by changing the folder options. If you prefer to have each folder open up in its own window, this can be done through the Folder Options dialog box under the General tab. Personally I like the default setting where each folder is opened in the same window. You can chose to single-click to open an item or double-click (which is the default). Other tweaks can be made by clicking on the View tab. One of the options that I occasionally change is the Hidden files and folders. By default windows doesn't show hidden files, folders or drives. Sometimes I NEED to see these items and through the View tab I can select to Show hidden files, folders, and drives.
The activities for this chapter included taking snips of various screen shots and answering questions about Power Plans, Folder Options, and Address Toolbar display/content results. One of the snips taken shows that the Address toolbar has been added to my taskbar. The other snips are of screen shots that shows the results of various searches using the Address toolbar.
The key lesson learned from this chapter is that there is no wrong or right way to customize your desktop. It is very much the idea of whatever floats your boat is the right way.
Tuesday, June 26, 2012
Chapter 4 Personal Info Management & Communication
Nothing but a big fat *sigh* for this chapter. Apparently the version of Windows Live Essentials I'm currently using is more up to date than the text book. My screen in the Windows Live Mail app doesn't match the text book. Here's what mine looks like:
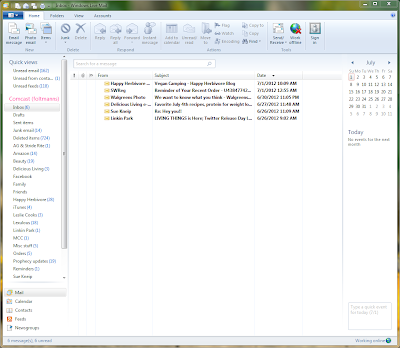 Notice anything different? I have big icons like Office 2010 on a big fat ribbon under the toolbar. You can hide this ribbon if only Microsoft allowed for the options to be included in the toolbar, so you dare not hide it. I made adjustments by performing the steps using what's available now in the newer version of Window Live Mail (WLM version 15.4.3555.0308). The text book walks you through composing a new e-mail message using stationery. What stationery? That isn't an option in version 15. It's not that I use e-mail stationery, but I wanted to complete the exercises in the text book, and could not do so. One technique that I had forgotten about is the triple clicking to select a phrase in order to format the phrase. I was able to perform this exercise as described in the text making the minor changes due to the different version. One example is the font size button. In the text it shows a list of font sizes with an example word to give an idea of how big it will appear. The new version of WLM does not have this feature. It's just a list of font sizes with no example. Setting up, working with, composing e-mail from the contacts folder is
pretty straight forward. The Calendar included in WLM is a nice feature. I have been using this
to remind me of upcoming birthdays for family and friends. I learned to
add an event and how to update the reminder feature.
Notice anything different? I have big icons like Office 2010 on a big fat ribbon under the toolbar. You can hide this ribbon if only Microsoft allowed for the options to be included in the toolbar, so you dare not hide it. I made adjustments by performing the steps using what's available now in the newer version of Window Live Mail (WLM version 15.4.3555.0308). The text book walks you through composing a new e-mail message using stationery. What stationery? That isn't an option in version 15. It's not that I use e-mail stationery, but I wanted to complete the exercises in the text book, and could not do so. One technique that I had forgotten about is the triple clicking to select a phrase in order to format the phrase. I was able to perform this exercise as described in the text making the minor changes due to the different version. One example is the font size button. In the text it shows a list of font sizes with an example word to give an idea of how big it will appear. The new version of WLM does not have this feature. It's just a list of font sizes with no example. Setting up, working with, composing e-mail from the contacts folder is
pretty straight forward. The Calendar included in WLM is a nice feature. I have been using this
to remind me of upcoming birthdays for family and friends. I learned to
add an event and how to update the reminder feature.
Moving on...
The biggest frustration of all for me was trying to use the Newsgroup folder. I used to subscribe to newsgroup articles back in the day, say when I was still using Outlook Express....which by the way worked perfectly for me. Never had any issues, why on earth did Microsoft think they had to do away with something that worked to be replaced by WLM which (in my humble opinion) isn't an improvement? The text book says to click the newsgroup button to display the newsgroup pane. Next it says to view newsgroup button to download a list of available newsgroups on the Microsoft news server and display the list in the Newsgroup Subscriptions dialog box. Then it says to scroll to display the microsoft.public.windows.live.mail desktop entry in the newsgroup list. Let me stop right here. I can click on the newsgroup folder found in the left pane at the bottom of the WLM screen. There is no subscribe button. So I tried clicking on the Accounts menu and tried adding a newsgroup account. But what newsgroup server do I use? Comcast (my ISP) apparently no longer supplies a server for newsgroups (see here for more info). When I put in Microsoft's NNTP news server, it looked like I would finally get somewhere. However, the Microsoft NNTP would not connect to the internet to download any of their groups. So I googled the issue and found this click here -- note the key phrase: "Beginning in June 2010, Microsoft will begin closing newsgroups and migrating users to Microsoft forums that include Microsoft Answers, TechNet and MSDN." So at this point I gave up. If there IS a way to do this using WLM version 15, please let me know.
RSS feeds is something I was already using, and this feature works. Following the text book instructions didn't go too badly. The RSS feed button was not on the PCMag home page as described in the text. I googled PCMag RSS feeds and found it that way to add to my RSS feeds list. Nothing like jumping through a bunch of hoops to get results. I'm not a big fan of Internet Explorer, just too buggy, but I did use IE to add the PCMag feed so I at least learned something new there. I also learned how to modify the feed's properties, something I did not know about before, so that was cool.
Web Slices did not work period. I followed the text going to www.msn.com and there wasn't a green icon to click on in order to subscribe to a web slice. Or is it there and I just can't see the forest for the trees?
Next....
The text covers other communication methods such as blogs, wiki's social media websites, groups, chat rooms, mailing lists, and instant messaging. I learned quite a bit about blogs, wiki's and other web 2.0 apps through my CIS145 class last semester. Instant messaging wasn't a topic covered in the CIS145 class, but I'm very familiar with this option as a way to communicate. In the past I've always chatted using either AOL Instant Messaging program (AIM) or the Yahoo messenger app. Except for rare occasions, I no longer use any IM app. I don't have the time to chat, nor the desire to be bluntly honest. The text covers how to use Windows Live Messenger. This application is not something I wanted to play around with, so I opted to just read through the section.
Luckily, the activities to be completed for this chapter isn't going to trip me up. Activity 1 is focused on RSS feeds...yay. Something I can handle, and I know works. Activity 2 is adding fake contacts to your contacts folder...something else I know works. Meanwhile, I'm really looking forward to chapter 5....I'm sure things will go much more smoothly!

Moving on...
The biggest frustration of all for me was trying to use the Newsgroup folder. I used to subscribe to newsgroup articles back in the day, say when I was still using Outlook Express....which by the way worked perfectly for me. Never had any issues, why on earth did Microsoft think they had to do away with something that worked to be replaced by WLM which (in my humble opinion) isn't an improvement? The text book says to click the newsgroup button to display the newsgroup pane. Next it says to view newsgroup button to download a list of available newsgroups on the Microsoft news server and display the list in the Newsgroup Subscriptions dialog box. Then it says to scroll to display the microsoft.public.windows.live.mail desktop entry in the newsgroup list. Let me stop right here. I can click on the newsgroup folder found in the left pane at the bottom of the WLM screen. There is no subscribe button. So I tried clicking on the Accounts menu and tried adding a newsgroup account. But what newsgroup server do I use? Comcast (my ISP) apparently no longer supplies a server for newsgroups (see here for more info). When I put in Microsoft's NNTP news server, it looked like I would finally get somewhere. However, the Microsoft NNTP would not connect to the internet to download any of their groups. So I googled the issue and found this click here -- note the key phrase: "Beginning in June 2010, Microsoft will begin closing newsgroups and migrating users to Microsoft forums that include Microsoft Answers, TechNet and MSDN." So at this point I gave up. If there IS a way to do this using WLM version 15, please let me know.
RSS feeds is something I was already using, and this feature works. Following the text book instructions didn't go too badly. The RSS feed button was not on the PCMag home page as described in the text. I googled PCMag RSS feeds and found it that way to add to my RSS feeds list. Nothing like jumping through a bunch of hoops to get results. I'm not a big fan of Internet Explorer, just too buggy, but I did use IE to add the PCMag feed so I at least learned something new there. I also learned how to modify the feed's properties, something I did not know about before, so that was cool.
Web Slices did not work period. I followed the text going to www.msn.com and there wasn't a green icon to click on in order to subscribe to a web slice. Or is it there and I just can't see the forest for the trees?
The text covers other communication methods such as blogs, wiki's social media websites, groups, chat rooms, mailing lists, and instant messaging. I learned quite a bit about blogs, wiki's and other web 2.0 apps through my CIS145 class last semester. Instant messaging wasn't a topic covered in the CIS145 class, but I'm very familiar with this option as a way to communicate. In the past I've always chatted using either AOL Instant Messaging program (AIM) or the Yahoo messenger app. Except for rare occasions, I no longer use any IM app. I don't have the time to chat, nor the desire to be bluntly honest. The text covers how to use Windows Live Messenger. This application is not something I wanted to play around with, so I opted to just read through the section.
Luckily, the activities to be completed for this chapter isn't going to trip me up. Activity 1 is focused on RSS feeds...yay. Something I can handle, and I know works. Activity 2 is adding fake contacts to your contacts folder...something else I know works. Meanwhile, I'm really looking forward to chapter 5....I'm sure things will go much more smoothly!
Sunday, June 24, 2012
Chapter 3 File and Folder Management
Chapter 3 covers how to work with the *Computer* folder window, along with the Pictures & Music libraries. Tasks performed included searching for files & folders, managing open windows, opening and using the Pictures & Music libraries, using Windows Photo Viewer, Windows Media Player, backing up and restoring a folder.
Every object in Windows 7 has properties that describes the object. In the past I have always right clicked on the object/file/folder, selected properties to view the certain details (usually the file size). Windows 7 has made this more of a breeze. For example, open the Computer folder, click on the local disk (C:) to see the property details found in the *Details* pane at the bottom of the window. The most popular general details are there to view at a glance: the size of the hard disk, the capacity filled and capacity available, how the disk is formatted. There are other more in depth details available by right clicking to get a properties dialog box to pop up. The information available in the dialog box for the C: drive includes tabs for general, security, hardware, tools, sharing, quota and previous versions.
When working with a folder, I can see the details in the pane at the bottom the same way I did with the C: drive. If I point to a folder icon, a screen tip will display with a preview of the properties. Like the C: drive I can display all of the properties available for a folder by right clicking, select properties from the shortcut menu to get a dialog box to pop up. If I need to find a file or folder but I am not sure where it is located, I can use the search box located in the upper right corner of the window. There are filters available to narrow down searches such as *date modified* and *size*.
Managing multiple open windows can be handled in various ways. Options include cascade, stacked, side by side and aero shake. Aero shake is an interesting feature. I wasn't understanding the text book in how to use this feature, so I googled *aero shake* and was able to quickly figure it out. I cannot see myself using this method of managing windows. For me, the most useful method is side by side.
The method for copy and pasting files and folders covered in this chapter is to right-click select copy, right-click select paste. For example, if I wanted to copy certain files in one location to a different location, I would select the file or files, right-click select copy. To paste them where I wanted them I would go to the location, right-click in an open area and select paste. If I want to move those files copied to a new folder, I would once again right-click in an open area and select new, then folder, and then rename the folder. To move the files to the new folder, I would select them all, drag and drop them onto the new folder. To refresh the image on the new folder, right-click and select refresh.
To view a picture individually in the Pictures library, click on the picture and select the preview button on the toolbar to open the Windows Photo Viewer. You could also double-click on the picture to do the same thing. In the same tool bar there is a slide show option if you wish to view the pictures as a slide show. This option allows you to select the speed and the order of the pictures to be displayed. Property information is viewed in the details pane. The details pane gives you an option to *tag* your pictures which makes finding pictures quicker using a search using the tag assigned. I could also rate the picture from 1 to 5 stars....not sure what good this does. Could be useful in search but I don't see why I would use this feature. Maybe someone who is more organized than I am would use it,
The details pane of a file in the Music library includes the album's icon (if one is available), file format, the name, genre, length, year and of course the rating feature. I can use the details pane to change the properties such as the genre to personalize how I organize my music files. To play a music file in Windows Media Player, select the file, click *Play* on the toolbar....this is the easiest way to perform this task.
The chapter covers how to backup and restore files and folders to both a USB flash drive and to a CD/DVD disc. To back up files to a USB flash drive, right-click the files you want to copy and paste them in an open area on the connected USB flash drive. The procedure is the same if you want to copy an entire folder and not individual files. To perform this procedure to CD/DVD disc, insert a blank disc into the optical disc burner. You have the option to format the disc like a USB flash drive (called the live file system)...this means I can add files to the same disc at any time. After the disc is formatted, select the files/folders you want to copy to the disc, then click the Burn button on the toolbar. To restore files from a backup source to the hard drive is just a matter of copying the data and pasting to the original location. For example, some files were accidentally permanently deleted from the hard drive. If I have these files on a jump drive or CD/DVD disc, I can copy and paste from a backup source to the appropriate location.
Saturday, June 16, 2012
Chapter 2 Working with the Win7 Desktop
Chapter 2 covers the following: how to create WordPad documents, moving/renaming a file, creating/moving a folder, using a USB flash drive to store a document, delete/restore shortcuts/files/folders using the Recycle bin. Also covered is how to customize and rearrange desktop gadgets.
WordPad is a scaled down version of Microsoft's powerful Word application. WordPad can format and print text, but lacks spell checker and a thesaurus. If you just need to type simple letters or memos, then WordPad fits your needs. To open the WordPad application, you press the start button, type in WordPad in the search box and press the enter key to launch the app. From this point you're ready to begin creating a document. The activity for this chapter was to create a simple document following the steps on pages 70 through 75 of the text book (see below).
One thing new I learned was a method of how to create a blank document directly in the Documents Library without opening an application. This method is called the document-centric approach. Right click an open area (white space) in the Documents Library. In the resulting shortcut menu, point to *New*, click the *Text Document* option, give the document a name, press enter. Right click on the file, point to *Open With* and select *WordPad*.
To copy documents (or any data for that matter) on a USB flash drive, you simply insert a USB drive into an open USB port on your computer (or via a Hub). Select *Open Folder to view files* from the auto-play popup dialog box. This action displays contents on the flash drive. You're ready to move files to the drive. Right click on any file, point to *send to* command and select the name & drive letter representing your flash drive. USB flash drives are very handy for backing up important files and useful for moving between physical computers.
There are several options as to how you can view the folders and files within your Documents Library. Options include small, medium, large or extra large icons, list view, tiles view, and the default details view. I prefer the list view. I like the organized and streamlined appearance this view gives. My method of arrangement is by folder, but there are several other options for arranging the order of your folders and file. Those options include: author, date modified, tag, type, name.
Creating a folder in the Documents Library is easy: click the *new folder* button on the tool bar and up pops a new folder ready to be re-named with the name of your choice. If you have a file that you want to move into this new folder, right-click and drag the file (don't let go of the mouse button) to the folder and click the *move here* command on the shortcut menu. I have always left clicked on files to drag and drop into folders so the right-click drag thing is new to me. Likewise, the *new folder* button is new to me as well. I have always right clicked in an empty space where I want a new folder and pointed to *new* and created a folder this way. There always seems to be more than one way, or several ways to perform the same function. There really is no *right* or *wrong* way, it's whatever method is easiest for the user to remember how to do something.
Desktop gadgets are like mini programs and can be useful tools. They can be also be customized. Click the Start button, select All Programs, followed by Desktop Gadget Gallery. See below for an idea of gadgets available in the gallery. The weather gadget is missing because the gadget is on my desktop. If you're not happy with the choices available, you can always click the *Get more gadgets online* link in the bottom right corner of the gallery. Otherwise right click on the gadget of your choice, click *add*. To customize the gadget on your desktop, right click on the gadget, select *options*. For the clock gadget, there are 8 views. Click the arrow left or right to select a different view. In the *Clock name* box, type in what you want to call the clock. For example, your first name. The name will appear on the clock. You can also set the time zone and select the option to show the *second* hand. To remove the gadget, click the close button or right click and select close gadget.
In addition to reading chapter 2, part of this week's assignment included reading Appendix B. Appendix B is entitled Windows 7 Security. Two activities was assigned to complete as well. Researching Antivirus Software was activity 1, and Viewing Windows Update was activity 2. In the text book under Appendix B it says, "according to Microsoft, Windows 7 has been engineered to be the most secure version of Windows ever."
Windows 7 includes security features to protect your computer from malware, spyware, viruses, worms and other potentially unwanted software.Windows 7 comes with a program called Windows Defender which is designed to protect your computer against malware. There is also a built in firewall which protects against unauthorized users between your computer and the internet (or a network). Windows does not include an anti-virus program. I do not use Windows Defender or Windows Firewall. I am using Norton's Security Suite provided free from my internet provider Comcast. I also have a paid application installed called Malwarebytes Anti-Malware. I have found both products to be more than adequate. If you don't have an anti-virus program installed on your computer, get one ASAP. Avast has a free version that blocks viruses & spyware.
Windows Update helps to protect your computer from viruses and other security issues. Windows Update periodically checks with Microsoft for updates for your computer. The updates will download automatically if you have configured the application to do so (highly recommend). I have my computer configured to download the updates but I do not want them installed automatically as I prefer to handle this manually. I've had one instance where an update was applied automatically and it caused a glitch with the firewall I was using at the time (Zone Alarm). The glitch made is impossible for me to connect to the internet. I disabled the firewall so I could research the issue and discovered it was a Windows Update that was the problem. I uninstalled the update and reactivated my firewall and was back in business. For this reason, I do not allow windows to apply updates automatically. If something goes wrong after a manual install, I will know immediately what the problem is.
WordPad is a scaled down version of Microsoft's powerful Word application. WordPad can format and print text, but lacks spell checker and a thesaurus. If you just need to type simple letters or memos, then WordPad fits your needs. To open the WordPad application, you press the start button, type in WordPad in the search box and press the enter key to launch the app. From this point you're ready to begin creating a document. The activity for this chapter was to create a simple document following the steps on pages 70 through 75 of the text book (see below).
 |
| Chapter 2 activity |
To copy documents (or any data for that matter) on a USB flash drive, you simply insert a USB drive into an open USB port on your computer (or via a Hub). Select *Open Folder to view files* from the auto-play popup dialog box. This action displays contents on the flash drive. You're ready to move files to the drive. Right click on any file, point to *send to* command and select the name & drive letter representing your flash drive. USB flash drives are very handy for backing up important files and useful for moving between physical computers.
There are several options as to how you can view the folders and files within your Documents Library. Options include small, medium, large or extra large icons, list view, tiles view, and the default details view. I prefer the list view. I like the organized and streamlined appearance this view gives. My method of arrangement is by folder, but there are several other options for arranging the order of your folders and file. Those options include: author, date modified, tag, type, name.
Creating a folder in the Documents Library is easy: click the *new folder* button on the tool bar and up pops a new folder ready to be re-named with the name of your choice. If you have a file that you want to move into this new folder, right-click and drag the file (don't let go of the mouse button) to the folder and click the *move here* command on the shortcut menu. I have always left clicked on files to drag and drop into folders so the right-click drag thing is new to me. Likewise, the *new folder* button is new to me as well. I have always right clicked in an empty space where I want a new folder and pointed to *new* and created a folder this way. There always seems to be more than one way, or several ways to perform the same function. There really is no *right* or *wrong* way, it's whatever method is easiest for the user to remember how to do something.
Desktop gadgets are like mini programs and can be useful tools. They can be also be customized. Click the Start button, select All Programs, followed by Desktop Gadget Gallery. See below for an idea of gadgets available in the gallery. The weather gadget is missing because the gadget is on my desktop. If you're not happy with the choices available, you can always click the *Get more gadgets online* link in the bottom right corner of the gallery. Otherwise right click on the gadget of your choice, click *add*. To customize the gadget on your desktop, right click on the gadget, select *options*. For the clock gadget, there are 8 views. Click the arrow left or right to select a different view. In the *Clock name* box, type in what you want to call the clock. For example, your first name. The name will appear on the clock. You can also set the time zone and select the option to show the *second* hand. To remove the gadget, click the close button or right click and select close gadget.
 |
| Windows 7 Gadget Gallery |
Windows 7 includes security features to protect your computer from malware, spyware, viruses, worms and other potentially unwanted software.Windows 7 comes with a program called Windows Defender which is designed to protect your computer against malware. There is also a built in firewall which protects against unauthorized users between your computer and the internet (or a network). Windows does not include an anti-virus program. I do not use Windows Defender or Windows Firewall. I am using Norton's Security Suite provided free from my internet provider Comcast. I also have a paid application installed called Malwarebytes Anti-Malware. I have found both products to be more than adequate. If you don't have an anti-virus program installed on your computer, get one ASAP. Avast has a free version that blocks viruses & spyware.
Windows Update helps to protect your computer from viruses and other security issues. Windows Update periodically checks with Microsoft for updates for your computer. The updates will download automatically if you have configured the application to do so (highly recommend). I have my computer configured to download the updates but I do not want them installed automatically as I prefer to handle this manually. I've had one instance where an update was applied automatically and it caused a glitch with the firewall I was using at the time (Zone Alarm). The glitch made is impossible for me to connect to the internet. I disabled the firewall so I could research the issue and discovered it was a Windows Update that was the problem. I uninstalled the update and reactivated my firewall and was back in business. For this reason, I do not allow windows to apply updates automatically. If something goes wrong after a manual install, I will know immediately what the problem is.
Monday, June 11, 2012
Chapter 1 Fundamentals of Using Win7
The various versions of Windows I have used dates back to before Windows 95 with Windows 3.0. Even earlier than that I was using MS DOS to run Word Perfect to work from home as a cottage typesetter in the late 1980's. That was my first home computer. It was a huge heavy thing and basically a very expensive word processor without a graphics card.
I fell in love with Microsoft Windows when the company I was working for upgraded from 3.0 to 95. In 1997, I took a home correspondence course to learn all I could about this OS. The course also taught how to open up the computer and install extra memory boards. With this course I was off and running learning everything that I could on my own and also on the job.
Fast forward to Dec. 2010. This is when I migrated from Windows XP to Windows 7 Home Premium 64-bit edition with the purchase of a new desktop computer. I absolutely loved XP, but love Windows 7 even more. One of my favorite features of Windows 7 is the Event Viewer. A couple months ago, I developed issues with my hard drive. Event Viewer gave me some very important clues as to what was going on (read errors GALORE). Long story short, I backed up my data and replaced the drive before it was too late.
Now onto Chapter 1 review! The chapter covers the basics of using Windows 7. How to start the OS, log on, display the start menu, expand and close a list, work with gadgets, launch & switch between programs, open/minimize/restore/move/size/scroll/close a window, use the help system, log off and turn off the computer. At this time the only gadget I use that is included with Windows is the weather gadget. I have found the gadget to be accurate but there are times when it will display a sunny day and it's midnight! The gadget usually updates itself to display the correct weather within an hour or so. The other gadget came with Nortons security suite provided free through Comcast, my internet provider. This gadget lets me know that my computer is *secure*.
There are 6 editions of Windows 7, starter, home basic, home premium, professional, enterprise, and ultimate. As I've already stated above, I am running home premium (on 8 gigabytes of RAM).
I also have downloaded Windows Live Essentials and use the Windows Live Mail as my email application. Mostly I love the new app, but it's missing the *select all* command. You can select all by manually shift selecting messages but I prefer the *select all* command, it was easier and faster for me to move a group of messages to a specific folder if I did not have a *rule* set up for doing this automatically. You have to wonder why such a basic command is missing. What was Microsoft thinking?
Windows 7 comes with an improved media player (in my opinion) called Windows Media Player. I use it to view my DVD movies. However, for music videos and music, I use iTunes. It's just easier for me to use iTunes because I purchase most of my music and music videos from the iTunes store.
I also love the improved start menu and the organization is better than previous versions of Windows. You can pin frequently used or favorite applications to the task bar. My pins include Firefox, a favorite game, iTunes, and Windows Live Mail. Below is a screen shot of my Windows 7 desktop.
One feature that is really cool in Windows 7 is the Aero Flip 3D to view open programs on the computer. By pressing CTRL+WINDOWS+TAB you will get this result (see screen show below). Pressing the tab key scrolls through the various screens. Point and click on the screen you would like to view and the 3D visual goes away bringing the screen you clicked on to the forefront.
Using Windows Help and Support is easy and makes short work of getting the answers you need to a question you have. The chapter used an example what you need to set up a home network for using the Help and Support application as practice. The chapter describes three methods for using Help and Support: browse for help topics in the Windows Basics section, search for help topics using the Table of Contents, Search Help and Support by using the Search Help text box window. If all else fails you can click the 'more support options' link to see additional methods for receiving help.
I just finished the Chapter 1 activities. This is the first time I've use the snipping tool. I like this tool because it saves time taking screen shots and saving them as .PNG or .JPG files. Usually I take screen shots by pressing ALT and PRTSCN. Then I open up another application to paste the screen shot and save the file. It's a pain to do things this way but at least there is a way to do it. With the snipping tool, you have more options. You can use the rectangle snip to select the exact portion that you want, or use a free form snip to draw around something willy nilly, or the full screen snip to capture everything opened on the desktop. The item you snipped opens in it's own window that allows you to save the file in four different formats.
The final reading for this week is found at the end of the text book on pages APP 1 and APP 2 -- Appendix A. Appendix A is a chart comparing the features of the 6 Windows 7 editions. Pretty handy at a glance to see what features are included in each edition. There IS one feature that I wish I had in my edition and that is the ability to be in Windows XP Mode. I don't know that I would actually use it, but I would like the option to be there.
I fell in love with Microsoft Windows when the company I was working for upgraded from 3.0 to 95. In 1997, I took a home correspondence course to learn all I could about this OS. The course also taught how to open up the computer and install extra memory boards. With this course I was off and running learning everything that I could on my own and also on the job.
Fast forward to Dec. 2010. This is when I migrated from Windows XP to Windows 7 Home Premium 64-bit edition with the purchase of a new desktop computer. I absolutely loved XP, but love Windows 7 even more. One of my favorite features of Windows 7 is the Event Viewer. A couple months ago, I developed issues with my hard drive. Event Viewer gave me some very important clues as to what was going on (read errors GALORE). Long story short, I backed up my data and replaced the drive before it was too late.
Now onto Chapter 1 review! The chapter covers the basics of using Windows 7. How to start the OS, log on, display the start menu, expand and close a list, work with gadgets, launch & switch between programs, open/minimize/restore/move/size/scroll/close a window, use the help system, log off and turn off the computer. At this time the only gadget I use that is included with Windows is the weather gadget. I have found the gadget to be accurate but there are times when it will display a sunny day and it's midnight! The gadget usually updates itself to display the correct weather within an hour or so. The other gadget came with Nortons security suite provided free through Comcast, my internet provider. This gadget lets me know that my computer is *secure*.
There are 6 editions of Windows 7, starter, home basic, home premium, professional, enterprise, and ultimate. As I've already stated above, I am running home premium (on 8 gigabytes of RAM).
I also have downloaded Windows Live Essentials and use the Windows Live Mail as my email application. Mostly I love the new app, but it's missing the *select all* command. You can select all by manually shift selecting messages but I prefer the *select all* command, it was easier and faster for me to move a group of messages to a specific folder if I did not have a *rule* set up for doing this automatically. You have to wonder why such a basic command is missing. What was Microsoft thinking?
Windows 7 comes with an improved media player (in my opinion) called Windows Media Player. I use it to view my DVD movies. However, for music videos and music, I use iTunes. It's just easier for me to use iTunes because I purchase most of my music and music videos from the iTunes store.
I also love the improved start menu and the organization is better than previous versions of Windows. You can pin frequently used or favorite applications to the task bar. My pins include Firefox, a favorite game, iTunes, and Windows Live Mail. Below is a screen shot of my Windows 7 desktop.
 |
| Desktop |
One feature that is really cool in Windows 7 is the Aero Flip 3D to view open programs on the computer. By pressing CTRL+WINDOWS+TAB you will get this result (see screen show below). Pressing the tab key scrolls through the various screens. Point and click on the screen you would like to view and the 3D visual goes away bringing the screen you clicked on to the forefront.
 |
| Aero Flip 3D |
I just finished the Chapter 1 activities. This is the first time I've use the snipping tool. I like this tool because it saves time taking screen shots and saving them as .PNG or .JPG files. Usually I take screen shots by pressing ALT and PRTSCN. Then I open up another application to paste the screen shot and save the file. It's a pain to do things this way but at least there is a way to do it. With the snipping tool, you have more options. You can use the rectangle snip to select the exact portion that you want, or use a free form snip to draw around something willy nilly, or the full screen snip to capture everything opened on the desktop. The item you snipped opens in it's own window that allows you to save the file in four different formats.
The final reading for this week is found at the end of the text book on pages APP 1 and APP 2 -- Appendix A. Appendix A is a chart comparing the features of the 6 Windows 7 editions. Pretty handy at a glance to see what features are included in each edition. There IS one feature that I wish I had in my edition and that is the ability to be in Windows XP Mode. I don't know that I would actually use it, but I would like the option to be there.
Subscribe to:
Comments (Atom)